
Technical Tip
Micronet cannot handle 32 bit images (images with a transparent background).
Image fields are for images you want displayed on your report. For example, you might want your company logo displayed on the first page of a report or in the report headers. Alternatively, if you have setup Signature Capture in POS, you might want customer signatures printed on invoices or other reports.
Image fields can be added to any section of the report except a Question section. In Micronet 2.7, you can only import JPG files. In Micronet 2.8, you can also import BMP or PNG files.
|
|
|
Technical Tip Micronet cannot handle 32 bit images (images with a transparent background). |
To add an image field to a report:
Refer to "Edit - Add Field".
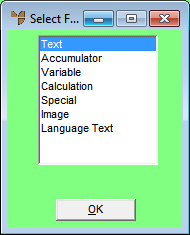
Select Field Type
Micronet displays the Enter Image Filename screen.

|
|
|
Technical Tip You can display this screen quickly by selecting the Picture Tool on the Report Generator toolbar and then drawing a box of the required size on the report where you want the image to be added.
|
|
|
Field |
Value |
|
|
Image Source |
If the image already exists in a Micronet field, select the field you want to get the image from. For example:
|
|
|
File Name |
Alternatively, enter the path and filename of the image file you want to add, or select the browse (...) button to find the image file. |
|
|
Print Logic |
Enter any condition where the field is to be displayed if the condition is valid. For example, this would be used in the invoice format where you only want the Sales Tax field to be shown if the debtor is a wholesale debtor. Therefore in the Print Logic field of the Sales Tax field on the report, you would enter: DBT_RETAIL = = 'W'. This will only print the field when the debtor is a wholesale debtor. 0 = Does not print |
|
|
Image Path |
2.8 Feature Micronet displays the directory it is getting the image from. |
|
|
Default Path |
2.8 Feature Micronet displays the default directory for images. |
Micronet redisplays the Report Generator screen for the selected report. If you used the Picture Tool to insert the image field, the image displays where you clicked.
If you used menu options to insert the image field, Micronet displays a rectangle which moves with the cursor.
Micronet inserts the image on the report where you clicked.

You can hold down the Ctrl key to maintain the image's height to width ratio.
|
|

|
Warning When the report is saved, the image in the report is saved into an \Images folder within your Micronet folder. Never delete the files in this folder. |
